Using encrypted keys for authentication offers two main benefits. Firstly, it is convenient as you no longer need to enter a password (unless you encrypt your keys with password protection) if you use public/private keys. Secondly, once public/private key pair authentication has been set up on the server, you can disable password authentication completely meaning that without an authorized key you can’t gain access – so no more password cracking attempts.
if you use a windows based client and use PuTTY for ssh then you’ll need to download PuTTYgen
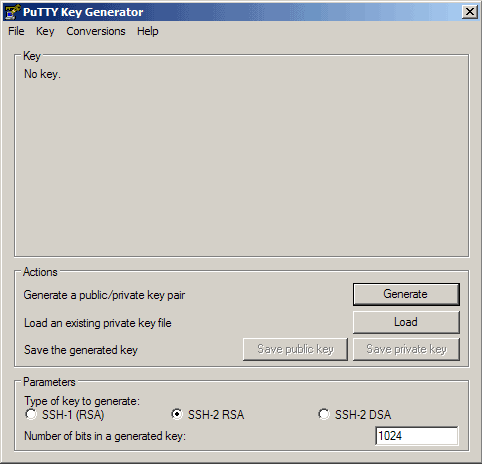
We can use PuTTYgen to create a private/public key pair. Start it by double-clicking its executable file. Make sure you select SSH-2 RSA under Type of key to generate and specify 1024 as the Number of bits in a generated key. Then click on Generate:
Now a private/public key pair has been generated. Under Key comment, you can enter any comment; normally you use your email address here. Then specify a Key passphrase and repeat it under Confirm passphrase. You’ll need that passphrase to log in to SSH with your new key. Then click on Save public key and save it in some safe location on your computer. You are free to choose a filename and extension, but it should be one that lets you remember for which system it is.
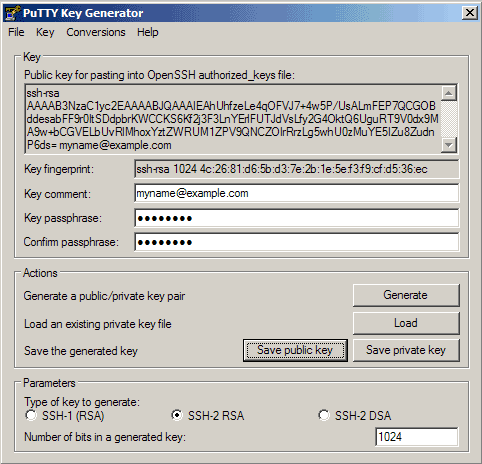
Then click on Save private key. You can save it in the same location as the public key – it should be a location that only you can access and that you don’t lose! (If you lose the keys and have disabled username/password logins, then you can’t log in anymore!) Again, you’re free to choose a filename, but this time the extension must be .ppk
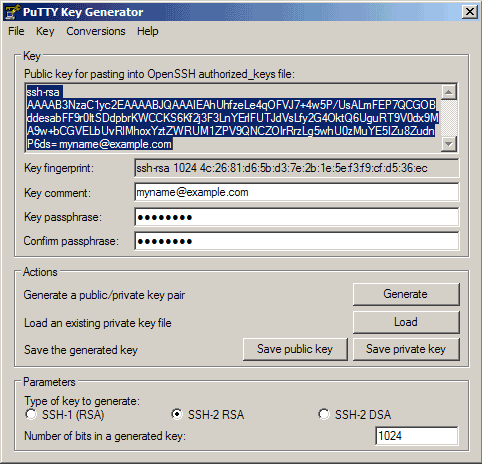
Now copy the public key from the PuTTYgen window, you’ll need to paste it into the key file were going to create on the server
Now we need to log into the server using the standard ssh username and password as we usually do, make sure you run the following commands as that user and not as root or su
mkdir ~/.ssh
chmod 700 ~/.ssh
Now load vi and lets copy our key over to the server. When vi loads, press “i” to allow inserting of text and then press the right mouse button, your copied key from PuTTYgen should be pasted into the document. Press “ESC” to exit text input mode
vi ~/.ssh/authorized_keys2
Now type :w to save and :q to quit the authorized_keys2 file. That file must be write/readable only by that user, so now we run
chmod 600 ~/.ssh/authorized_keys2
We can now close the ssh / PuTTY session, now reload PuTTY and find SSH > Auth from the left hand menu, browse for and select your private key and then save the session information. Also at this time, select Connection > Data from the left menu and put in your username, save the session again and you will not have to type anything to connect to your server again!

Once you are happy it is all working you can edit you /etc/ssh/sshd_config and disable password authentication by changing or uncommenting out these relevant lines:
ChallengeResponseAuthentication no
PasswordAuthentication no
UsePAM no
